Some links on this page are affiliate links. If you buy through them, we may earn a commission at no extra cost to you. As an Amazon Associate I earn from qualifying purchases. Learn more ›
How to Use a Stud Finder (and Find Studs Without One)
Master stud finder basics: magnetic vs electronic, calibration, edge vs center finding, and how to locate studs without a tool. Includes safety tips for drilling near wiring.
Finding a wall stud is essential for hanging heavy shelves, mounting a TV, or securing cabinets. A stud finder can locate the wood or metal framing behind drywall, but using one correctly requires knowing the differences between magnetic and electronic models, how to calibrate them, and how to confirm what you find. This guide covers step-by-step instructions for using a stud finder, plus reliable methods for finding studs when you don’t have a tool on hand. Always follow the manufacturer’s instructions for your specific device, and take safety precautions before drilling.
How Stud Finders Work
Stud finders detect changes in density or magnetic fields behind drywall. Electronic (or active) stud finders use sensors that measure capacitance or dielectric constant. When the sensor passes from drywall (low density) over a stud (higher density), the device signals a change. Magnetic stud finders, by contrast, detect the metal fasteners (nails or screws) that hold drywall to studs. Neither type sees through pipes or wires directly, though some electronic models include AC detection to warn of live wiring.
The key to accurate results is understanding what your tool is actually sensing. An electronic stud finder finds the edge of a stud, not its center, unless it is a “center-finding” model that calculates the midpoint automatically. A magnetic finder locates the fastener, which is usually near the center of the stud but can be slightly off.
Magnetic or Electronic: Which to Choose?
Both types have strengths and limitations. A magnetic stud finder is simple, inexpensive, and never needs batteries. It uses a magnet to pull toward the steel drywall screws or nails. It works on any wall covering (including plaster) as long as the fasteners are ferrous. However, it only finds fasteners, not the stud itself, and if the screws are deeply countersunk or covered with thick paint, the magnet may not detect them. It also gives no information about the stud’s width or edges.
An electronic stud finder (sometimes called a “deep scan” or “multi-sensor” finder) can locate the edges and center of a stud, and some models detect live AC wires. They require calibration on the wall and can be fooled by moisture, metal lath in plaster, or uneven drywall. They are more versatile but cost more and need batteries.
For most DIY work, an electronic stud finder is the better all-around choice. If you only need to hang light items and know where the fasteners are, a magnetic stud finder can be a quick and reliable backup. For deeper scanning or wiring detection, look at stud finders with AC detection.
Using an Electronic Stud Finder
Electronic stud finders vary by brand, but the general steps are similar. Always read the manual for your model.
Step 1: Prepare the Wall
Remove any objects hanging on the wall in the area you plan to scan. The finder must be placed on a flat, clean surface. If the wall is textured (e.g., orange peel or popcorn), you may need to hold the finder flat and slide it slowly. Some models work better if you place a piece of paper over the texture first.
Step 2: Calibrate on the Wall
Most electronic stud finders require calibration on a section of the wall that does not contain a stud. Place the finder flat against the wall and press the calibration button (or hold the power button, depending on the model). The device will beep or show a light indicating it is ready. Do not move the finder while calibrating. If you calibrate over a stud, the readings will be off. To ensure you are over empty drywall, start in a location at least 12 inches from any known outlet or corner.
Step 3: Slide Slowly to Find the Edge
Once calibrated, slide the finder slowly (about 1 inch per second) horizontally across the wall. When it detects the edge of a stud, it will beep, flash, or show a signal. Mark that spot with a pencil. Continue sliding past the stud until the signal drops, marking the other edge. The stud is between the two marks. For a standard 2×4 stud, the edges should be about 1.5 inches apart (the actual width of a 2×4). Some finders automatically indicate the center; if yours does not, the center is halfway between the two edge marks.
Step 4: Verify with a Second Pass
Move the finder back to the starting point and slide again to confirm the marks are consistent. If the finder gives a different location, re-calibrate and try again. Walls with double drywall, fire blocking, or horizontal strapping can cause false signals.
Confirming a Stud
Before drilling, always confirm that you have found a stud. A stud finder can give false positives due to metal pipes, conduit, or metal lath in plaster. Here are three reliable confirmation methods:
Tap test: Tap the wall with your knuckle. A solid, dull sound indicates a stud; a hollow sound indicates empty cavity. This is not foolproof but helps narrow the area.
Magnet test: Use a magnetic stud finder or a small rare-earth magnet to find the drywall screws. If you detect a screw near your mark, you are likely over a stud. The screw is usually driven into the center of the stud.
Small nail or pin: Drive a thin finish nail or a picture-hanging pin at your mark. If you hit solid wood after ½ to ¾ inch of drywall, you have found the stud. If you hit air, move over slightly; if you feel metal, stop and patch the hole. Probe only where wiring is unlikely, never directly above or below an outlet or switch.
If you are drilling for a heavy load (e.g., a TV mount or shelf bracket), use a drill bit slightly smaller than your screw and drill a pilot hole. Stop immediately if you feel a sudden change in resistance or see metal shavings (which could indicate a pipe or conduit).
Plaster and Tricky Walls
Plaster walls, especially older ones with metal lath, can confuse electronic stud finders. The metal lath creates a continuous conductive surface, causing constant false signals. Magnetic stud finders also struggle because the lath attracts the magnet everywhere. For plaster walls, try these approaches:
Look for clues: baseboard trim nails, outlet boxes (which are attached to studs on one side), or visible nail pops in the plaster.
Remove a small section of baseboard to see the stud location directly, then patch later.
Use a thin drill bit to probe carefully at likely stud locations (16 or 24 inches from corners) until you hit wood.
For walls with tile, stone, or metal backing (like metal studs in commercial buildings), a standard stud finder may not work. Metal studs require a “deep scan” electronic finder that can sense metal behind tile. For tile, a magnetic finder may work if the tile is thin enough for the magnet to reach the metal stud. Always test in an inconspicuous area first.
If you are working on a wall that contains radiant heating or in-floor tubing, consult a professional or use a thermal camera to avoid puncturing pipes.
Finding Studs Without a Tool
If you don’t have a stud finder, you can still locate studs using simple observation and measurement. These methods are less precise but often sufficient for light-duty hanging.
Use a Known Reference Point
Studs are typically spaced 16 or 24 inches on center (measured from the center of one stud to the center of the next). Start from a corner or an electrical outlet. Many outlet boxes are fastened to the side of a stud, so a stud is often just to the left or right of the box. Find which side with a magnet or tap test, then measure 16 inches from that stud to find the next one. Confirm with a magnet or tap test.
Look for Visual Clues
Baseboard trim is often nailed into studs. Look for nail heads (sometimes filled and painted over) or small dimples in the paint. Similarly, crown molding, chair rails, and window or door casings are typically fastened to studs. Use a magnet to find the nails in the trim, then measure from there.
Measure from a Corner
Measure 16 inches from an interior corner (where two walls meet). Mark that spot, then measure another 16 inches, and so on. This gives the approximate center of each stud. Because framing usually starts at one end of the wall, the edge of the first stud is often about 15-1/4 inches from the corner where the layout began, with more studs every 16 inches after that. Verify with a magnet or small nail before committing.
Use a Strong Magnet
Even without a dedicated magnetic stud finder, a small neodymium magnet (like those from old hard drives or craft magnets) can find drywall screws. Slide the magnet across the wall in a grid pattern. When it catches on a screw, mark the spot. The screw is likely near the center of a stud. This method works best on walls with thin paint and no metal lath.
Drilling Safely Near Wiring
Drilling into a wall that contains electrical wiring can be dangerous. Follow these safety guidelines:
Always turn off power to the circuit at the breaker before drilling near outlets or switches, if possible.
Use a stud finder with AC detection if you have one. Even then, AC detection has limits: it may not detect wires behind metal conduit or wires that are not live. Treat the AC detection as a warning, not a guarantee.
Keep drill depth short. Use a drill bit with a stop or wrap tape around the bit at 1 inch to limit penetration. Most drywall is ½ to ⅝ inch thick; a stud is about 1.5 inches deep. Electrical codes generally require cables that pass through studs to sit at least 1-1/4 inches back from the face of the stud or be covered by a steel plate, so short screws and shallow pilot holes are much less likely to reach them.
Never drill directly above or below an outlet or switch, as wires often run vertically from the box. Stay at least 6 inches to either side of the box horizontally.
If you encounter unexpected resistance or see sparks, stop immediately and call an electrician.
If you would rather start from a short list, these are popular options on Amazon for this search. Check each listing’s details, size and current price before you buy.
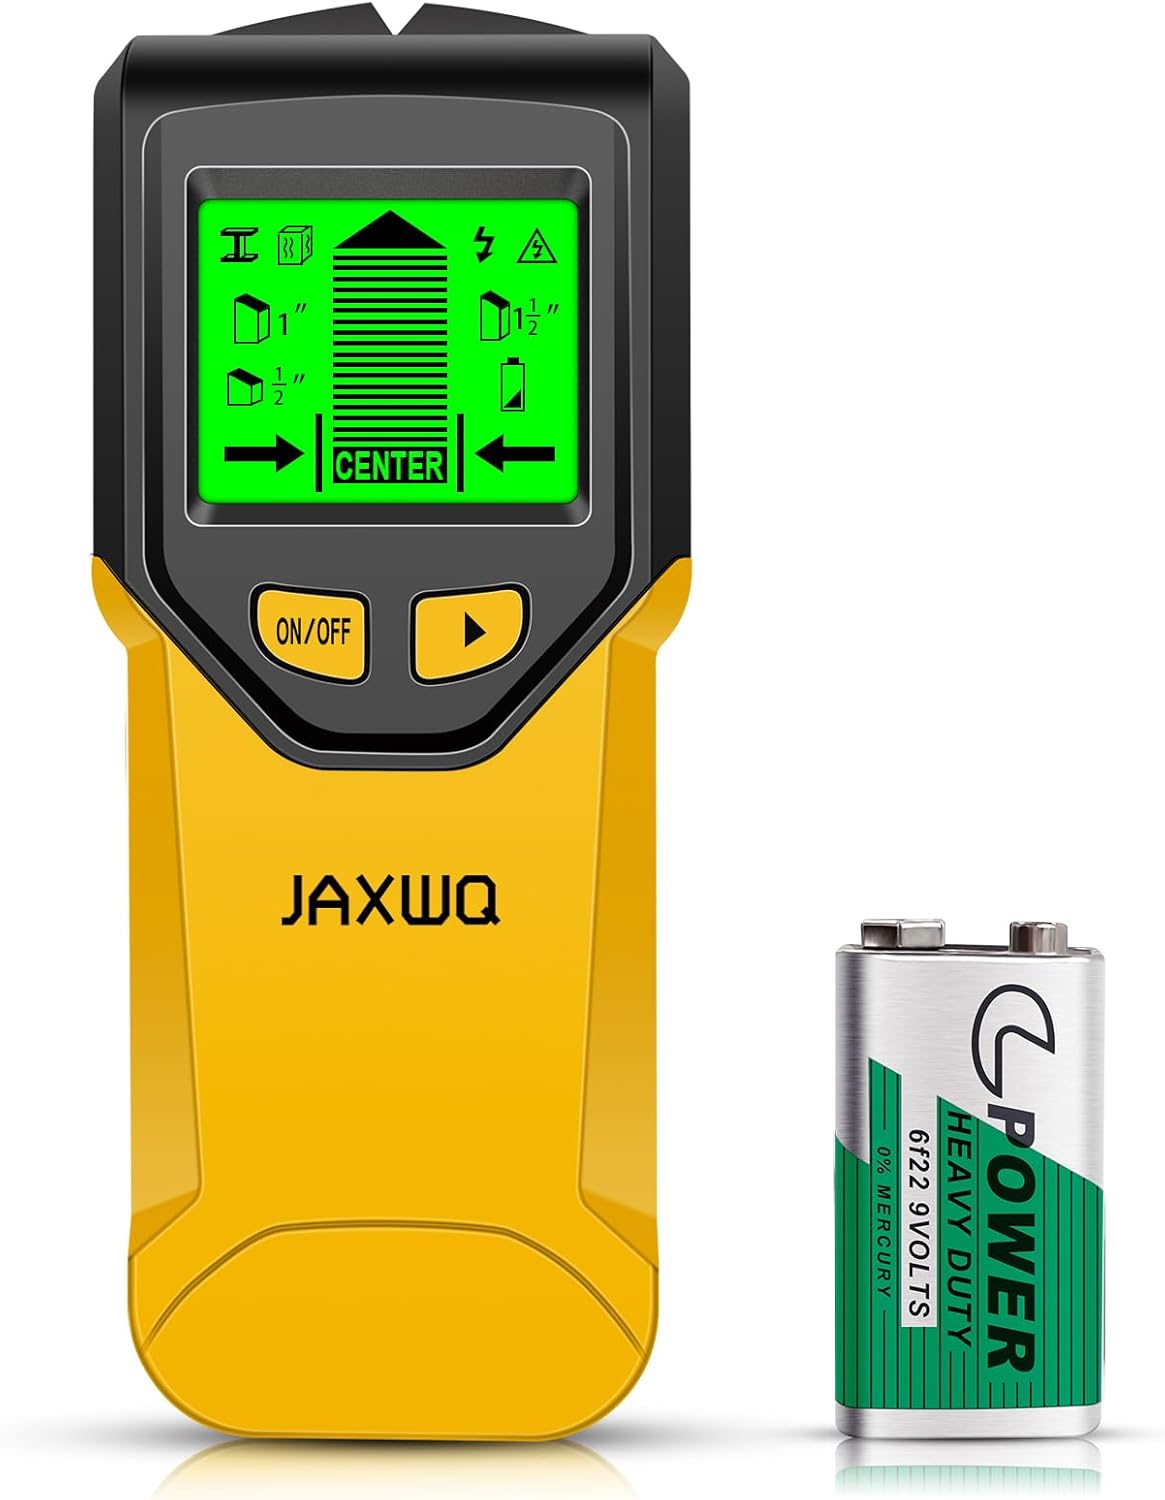
This 5-in-1 stud finder accurately detects wood studs, metal, pipes, and live AC wires with an intuitive LCD display and multiple scan modes. Ideal for DIYers and homeowners who need reliable wall detection for mounting projects without the guesswork.
Pros & Cons
Pros
Highly accurate detection with multiple scan modes adapts to different materials and wall depths
Clear LCD display with visual and audio feedback makes it intuitive for users of all skill levels
Detects live AC wires, providing a critical safety feature for preventing electrical accidents
Excellent value for the price compared to premium stud finder alternatives
Lightweight yet sturdy construction feels durable despite its affordable cost
Cons
Battery not included in the package, requiring separate purchase of alkaline batteries
Some users report the device feels slightly hollow initially, though performance is not affected
Requires brief calibration before each use, adding a few seconds to your workflow
Detailed Review
The YourHomeImprovementExpert 5-in-1 Stud Finder is a multi-purpose wall scanner designed for homeowners, DIY enthusiasts, and professionals who need reliable detection of studs, metal, pipes, and live wires. Whether you're mounting a TV, hanging heavy shelves, or installing bathroom fixtures, this tool eliminates the unreliable knock-and-listen method and prevents costly mistakes.
The standout feature is its intelligent microprocessor chip with high-sensitivity micro-sensors that deliver rapid, accurate results. Multiple scan modes including stud center, edge detection, deep scan, and metal scan give you flexibility to detect various materials at different depths. The bright backlit LCD display combined with audio alerts provides clear confirmation of stud location, making it accessible even in dim lighting. Users consistently praise its accuracy and ease of use compared to older stud finders.
Design-wise, the device measures 2.8 x 1.8 x 6.8 inches and weighs just 8.1 ounces, making it comfortable to hold during extended scanning sessions. While some reviewers initially noted it feels slightly hollow, the device performs excellently and feels more substantial once the battery is installed. The construction quality exceeds expectations for the price point, with an electronic engineer reviewer noting the engineering is impressive for the cost.
One minor drawback is that batteries are not included, requiring a separate purchase of alkaline cells. Additionally, the device requires brief calibration before each use, though this takes only seconds. These are minor trade-offs given the affordability and reliable performance.
This stud finder ranks number one in its category and delivers professional-grade functionality at an accessible price. It's an excellent investment for anyone tackling wall-mounted projects, offering peace of mind through accurate detection and live wire safety features that prevent dangerous and expensive mistakes.
Specifications
Brand: YourHomeImprovementExpert Manufacturer: JAXWQ Model Number: TH410 Part Number: 139-B-RED Color: Cherry Power Source: Battery Powered (Alkaline) Dimensions: 2.8 x 1.8 x 6.8 inches Weight: 8.1 ounces Detection Modes: Stud Scan, Deep Scan, Metal Scan Detection Capabilities: Wood studs, metal, pipes, live AC wires Display: HD LCD with backlight Alerts: Visual display and audio beep confirmation ASIN: B0GG9P7CHH
Buyer Guide
Who Should Buy This? This stud finder is ideal for homeowners planning renovation projects, DIY enthusiasts tackling wall-mounted installations, and professionals who need reliable multi-function detection. It's perfect for anyone hanging TVs, shelves, cabinets, or other heavy wall fixtures who wants to avoid damage and safety hazards.
Key Considerations: Ensure you have alkaline batteries on hand before using, as they are not included. The device requires quick calibration on a bare wall before scanning, which takes only a few seconds. Multiple scan modes mean you can adapt the tool to different detection needs, from finding stud centers to detecting metal plumbing or live wires.
Setup and Use: First-time users appreciate the intuitive interface that requires minimal learning curve. The LCD display clearly shows detection results, and the audio alert confirms when you've located the center of a stud. The lightweight design allows comfortable extended use without hand fatigue.
Value Assessment: At its price point, this 5-in-1 detector offers exceptional value compared to single-function alternatives or premium branded options. The inclusion of live wire detection adds significant safety value that justifies the investment for any serious home project.
The eOUTIL ST100B is an affordable, user-friendly stud finder that detects wood and metal studs up to 1 inch deep with visual LED indicators and audio alerts. It's ideal for DIYers and homeowners who need reliable stud detection for TV mounting, cabinet installation, and other wall projects without the complexity of advanced models.
Pros & Cons
Pros
Extremely affordable entry-level stud finder that delivers consistent results
Intuitive operation with quick calibration and clear visual plus audio feedback
Versatile detection works across diverse wall materials and surfaces
Lightweight and portable design makes it convenient for any home project
Cons
Limited to 1-inch detection depth, so it cannot find studs behind thicker walls or multiple layers
Requires 9V battery which is not included in the package
No advanced features or digital display that some professional users may prefer
Detailed Review
The eOUTIL ST100B stud finder is a no-frills wall scanner designed for homeowners and DIYers who need reliable stud detection without paying premium prices. Whether you're mounting a TV, installing shelving, hanging cabinets, or securing garage racks, this compact tool helps you locate studs safely and accurately to avoid damaging plumbing, electrical wiring, or other hidden utilities.
The standout feature is its dual detection system combining 4-level LED indicator lights with audio beeping. As you move the scanner across the wall, the lights gradually brighten and the beeping intensifies as you approach a stud, then alerts you when you reach the center. Calibration takes just 0.5 seconds with a simple button hold, and you can calibrate on the wall surface, in the air, or directly on a stud for maximum flexibility.
Build quality is solid for the price point. The plastic housing is durable and lightweight at only 3.2 ounces, making extended use comfortable. The sensor works effectively across various wall types including drywall, wallpaper, lath, acoustic ceilings, and painted surfaces, giving it genuine versatility for different home situations.
The main limitation is its 1-inch detection depth, which works fine for standard drywall but won't penetrate thicker walls or multiple layers. Additionally, the device requires a 9V battery not included in the package. These minor constraints rarely impact typical home use cases and are reasonable tradeoffs at this price.
Overall, the eOUTIL ST100B delivers excellent value for budget-conscious homeowners. With strong customer ratings and straightforward operation, it's a dependable choice for basic stud-finding tasks that eliminates guesswork and helps ensure safe, secure wall installations.
Specifications
Detection Depth: 1 inch (25.4 mm) for wood and metal
Power Source: 9V battery (not included)
Operating Frequency: 10 KHz
Display Type: 4-level LED indicator lights with audio alarm
Dimensions: 2.56 inches L x 1.57 inches W x 1.57 inches H
Weight: 3.2 ounces
Material: Plastic housing
Protection Rating: IP54 (dust and water resistant)
Calibration Time: 0.5 seconds
Model Number: ST100B
Buyer Guide
Who Should Buy This: Homeowners, renters, and DIY enthusiasts tackling occasional wall projects like TV mounting, shelf installation, or picture hanging. It's perfect for first-time stud finder users who want simplicity and affordability.
Who Might Want Something Else: Professional contractors working on thick walls or complex construction may benefit from higher-end models with greater detection depth. Those needing digital displays or advanced features should consider premium alternatives.
Setup Tips: Purchase a 9V battery before using. Always calibrate on the wall surface where you'll be working for most accurate results. Move the scanner slowly across the wall and note where the lights brighten most intensely to pinpoint stud centers.
Best Uses: TV wall mounting, installing floating shelves, hanging heavy mirrors, securing cabinet brackets, mounting garage organization systems, and any project requiring secure wall anchoring.
The StudBuddy is a simple, battery-free magnetic stud finder that locates studs by detecting screw heads in drywall. Ideal for DIYers and homeowners who want a reliable, maintenance-free tool that works instantly without calibration.
Pros & Cons
Pros
No batteries means it's always ready to work anytime, anywhere
Powerful neodymium magnets reliably detect metal fasteners in studs
Durable USA-made construction with proven track record from thousands of satisfied users
Simple, foolproof design that anyone can use without instructions
Lightweight and portable with included carrying case for convenience
Cons
Limited to drywall and wood studs, not suitable for lath and plaster walls
Requires manual scanning across wall surface, slower than electronic scanners for large areas
May not work effectively on walls with non-metal fasteners or unusual construction methods
Detailed Review
The StudBuddy is a magnetic stud finder designed for homeowners, renters, and DIY enthusiasts who need a quick, reliable way to locate studs in drywall before hanging shelves, mirrors, or television mounts. This tool uses powerful neodymium magnets to detect the metal screws and nails that secure drywall to wooden or metal studs, offering a refreshingly simple alternative to electronic stud scanners.
What makes the StudBuddy stand out is its complete lack of complexity. There are no batteries to replace, no calibration required, and no buttons to press. Simply run the tool across your wall, and when it detects a fastener head, the magnetic pull causes it to stick to the wall, pointing you to the exact stud location. This straightforward approach works consistently on all standard drywall construction, making it ideal for anyone who values reliability over fancy features.
The build quality reflects its USA manufacturing heritage. The tool features durable plastic housing with encapsulated magnets that maintain their strength over time. At just 1.6 ounces, it's incredibly portable and comes with a convenient carrying case. The compact design makes it easy to store in a toolbox or junk drawer, always ready when you need it without any maintenance concerns.
The main limitation is its application scope. The StudBuddy is specifically designed for drywall and wood studs, not lath and plaster walls or unusual construction types. Additionally, it requires manual scanning, which takes longer than electronic scanners for covering large wall areas. However, for typical household projects, this trade-off is negligible given the tool's reliability and affordability.
The StudBuddy delivers exceptional value for anyone seeking a no-nonsense stud finder. Its proven design, durable construction, and maintenance-free operation make it a smart choice for both occasional and frequent users who want a tool that simply works every single time.
How It Works
The StudBuddy operates on a simple but effective principle. Standard drywall is fastened to wooden or metal studs using screws or nails. These metal fasteners create small magnetic points that the StudBuddy's super-strong neodymium magnets can detect.
To use the tool, slowly move it horizontally across your wall surface. When the magnets encounter a fastener head, the magnetic attraction becomes strong enough to make the tool stick firmly to the wall. This adhesion points you directly to the stud location. Once you've found one fastener, you can measure vertically to locate additional fasteners on the same stud, as they're typically spaced 16 inches apart.
This method works reliably across all standard drywall construction types without any setup or configuration needed. The magnets are permanently encapsulated, so their strength remains consistent indefinitely.
Specifications
Brand: The StudBuddy
Model Number: 001
Material: Plastic with encapsulated neodymium magnets
Color: Orange
Weight: 1.6 ounces
Included Components: Stud finder tool and carrying case
Power Source: None required, magnet-based operation
Best For: Drywall and wood stud detection
Not Recommended For: Lath and plaster walls
Warranty & Support: Made in the USA with quality construction
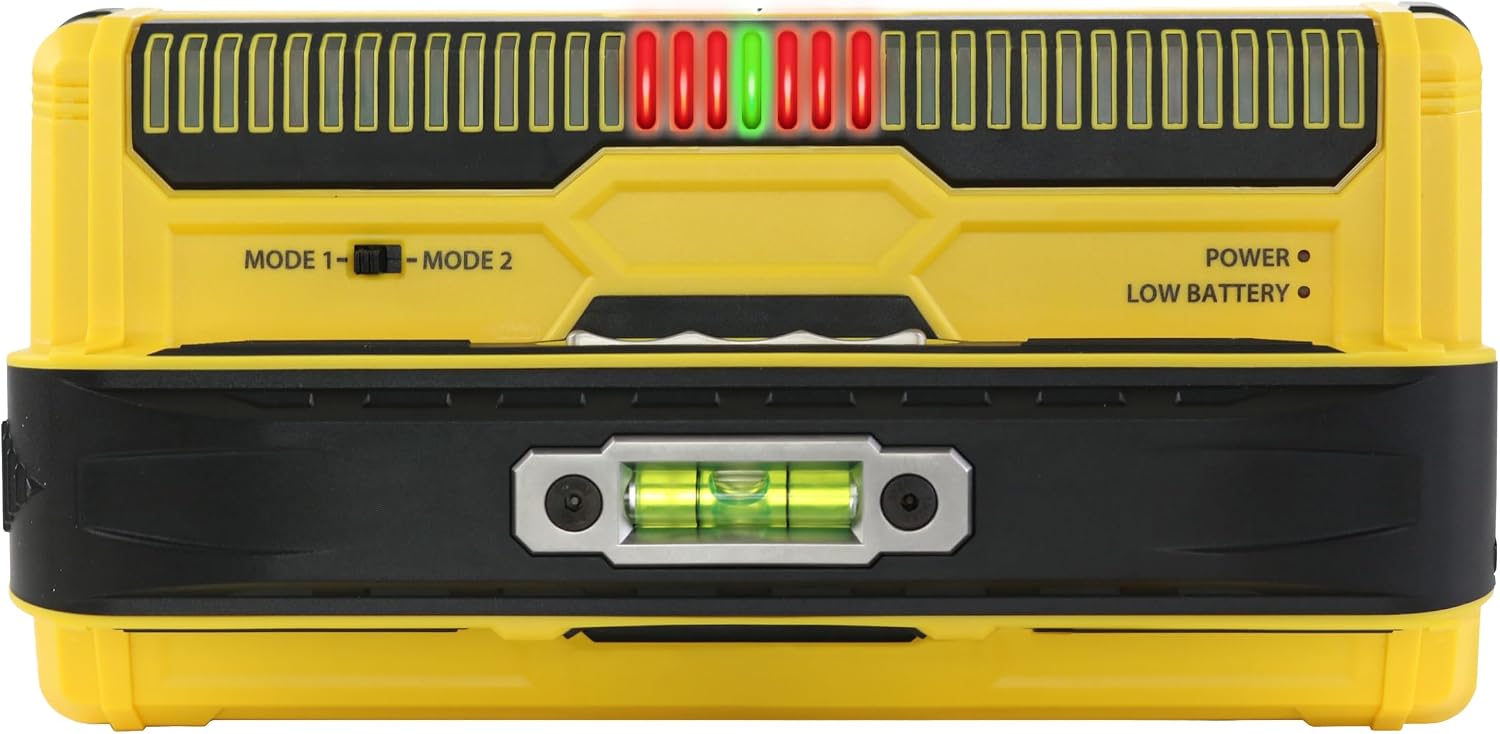
The Zircon StudScout is a simple, battery-free magnetic stud finder that reliably locates studs and includes a built-in level and easy-mark button for precision work. Ideal for DIYers tackling home projects who want a no-fuss, always-ready tool without electronic complications.
Pros & Cons
Pros
No batteries required, so it's maintenance-free and always functional when needed
Simple, intuitive design with no complicated settings or learning curve
Dual functionality as both stud finder and level saves space and money
Highly portable at just 1.28 ounces, making it ideal for overhead and ladder work
Affordable price point makes it practical to own multiple units for different locations
Cons
Very small size can make it easy to misplace if not used with the wrist lanyard
Magnetic detection relies on finding metal fasteners, which may not always be present in every stud
Limited to ferrous metal detection, so it won't work on walls without standard metal nails or screws
Detailed Review
The Zircon StudScout is a magnetic stud finder designed for homeowners and DIYers who want a straightforward, fuss-free solution for locating wall studs. Unlike electronic stud finders that require batteries, calibration, and troubleshooting, this tool uses a powerful magnet to locate the metal fasteners that secure studs to drywall. It's perfect for anyone hanging shelves, mounting TVs, or installing artwork who needs quick, reliable results without complexity.
The standout features make this tool remarkably practical for real-world use. The easy-mark button lets you mark stud locations with a single press, eliminating guesswork during layout and drilling. The integrated bubble level means you can check alignment without switching tools, and the wrist lanyard keeps it secure during overhead work or ladder use. Customer reviews consistently praise how well it works for small to medium projects, with users appreciating the simplicity and instant readiness.
Build quality is solid for the price point. At just 1.28 ounces and measuring 3.37 by 1.3 inches, the StudScout is genuinely portable and won't weigh you down during extended work. The yellow color makes it visible in tool bags and on work surfaces. The compact design is both a strength for portability and a potential weakness if you're prone to misplacing small tools, though the included lanyard mitigates this concern.
The main limitation is that magnetic detection depends on finding metal fasteners within studs. While most wall studs are fastened with nails or screws that the magnet will detect, this method isn't foolproof in every scenario. Some users noted it works exceptionally well for locating fasteners in window sills and other trim, even if stud detection occasionally misses. For basic home projects and occasional use, this limitation rarely causes problems.
The Zircon StudScout delivers excellent value for DIYers who want simplicity and reliability without electronic complications. It's a no-nonsense tool that does its job well, earns its affordable price, and comes backed by a limited lifetime warranty. Highly recommended for anyone looking for a dependable, battery-free stud finder.
Specifications
Brand: Zircon
Model Number: 75306
Dimensions: 3.37 x 1.3 x 0.79 inches
Weight: 1.28 ounces
Color: Yellow
Power Source: Hand-powered (battery-free)
Included Components: One magnetic stud finder with wrist lanyard
Warranty: Limited lifetime warranty
Detection Method: Magnetic detection of ferrous metal fasteners
Best For: Homeowners and DIYers tackling small to medium home projects like hanging shelves, mounting artwork, installing picture frames, or mounting small TVs. Ideal for anyone who prefers simplicity over electronic gadgets.
Not Ideal For: Professional contractors working on large-scale projects or situations where you need to locate studs without metal fasteners. Also not suitable for users who need to scan through thick walls or locate studs in non-standard wall construction.
Tips for Best Results: Use the wrist lanyard to keep the tool secure during overhead work. Move the tool slowly across the wall surface to ensure the magnet makes contact with fasteners. Mark stud locations with the easy-mark button as you go. The built-in level works best on horizontal surfaces like shelf installation.
Comparison Consideration: Unlike electronic stud finders that require batteries and calibration, the StudScout offers instant readiness and zero maintenance. However, electronic scanners may provide more comprehensive stud detection in complex wall situations. For basic home projects, the magnetic approach is often more reliable and frustration-free.
FAQ
Why does my stud finder beep constantly on a plaster wall?
Plaster walls often contain metal lath (a mesh of thin metal strips) that triggers the sensor continuously. Electronic stud finders cannot distinguish between lath and a stud. Use a magnetic stud finder or the measurement method instead. For more on stud finders and their limitations, visit our stud finders page.
Can I use a stud finder on a ceiling?
Yes, but the same principles apply. Ceiling joists are typically spaced 16 or 24 inches on center. Calibrate the finder on the ceiling surface, then slide it perpendicular to the direction of the joists. Use a helper or a ladder to keep the finder flat. Confirm with a small nail or magnet.
How do I find a stud behind a mirror or tile?
For mirrors, use a magnetic stud finder on the edges where the mirror is attached to the wall (usually with clips). For tile, an electronic deep-scan stud finder may work if the tile is not too thick. Test on a small area first. Alternatively, measure from a known reference point (like a corner) and drill through a grout line if possible.
What is the difference between edge-finding and center-finding stud finders?
An edge-finding stud finder signals when it reaches the edge of a stud. You must mark both edges and find the center yourself. A center-finding model automatically calculates the midpoint and indicates it with a light or beep. Center-finding models are more convenient but can be less accurate if not calibrated properly. Always verify with a magnet or pilot hole.
Using a stud finder correctly takes practice, but once you master the calibration and confirmation steps, you can hang heavy items with confidence. When you cannot use a finder, the measurement and magnet methods are reliable alternatives. Always prioritize safety: read the tool manual, wear eye protection, and unplug or remove the battery before changing bits. For more on tool selection, see our guide on jigsaw vs reciprocating saw for cutting tasks that may involve studs.
A cordless drill for home use should match the projects you tackle. Look at voltage, motor type, clutch, chuck size, battery capacity, and whether you need a hammer function.
Milwaukee tool vs DeWalt compared on battery platform, tool range, durability, warranty and jobsite fit, so you can pick the right brand for your work.
This roundup compares combination squares by listing specs, including blade lengths, graduations, heads, levels and scribers. Check each listing for current details.
This guide compares marking tools by listing specifications, including chalk markers, carpenter pencils, marking gauges and squares. Check each listing for current details before buying.
Compare five digital calipers chosen from manufacturer specifications. See which model fits your precision measuring needs for DIY, 3D printing, or professional work.
Best laser distance measure picks from Bosch, MiLESEEY, Klein Tools, RockSeed, and DTAPE, compared by range, accuracy, and features. No hands-on testing.
We compared listed specs for five laser levels useful for shelves, tile and pictures. Details on accuracy, range, beam color and accessories help you choose.
Learn to read dial and digital calipers, including zeroing, outside, inside, depth, and step measurements, plus digital units, zero shift, and battery care.