By Caleb Morgan
Updated November 2026
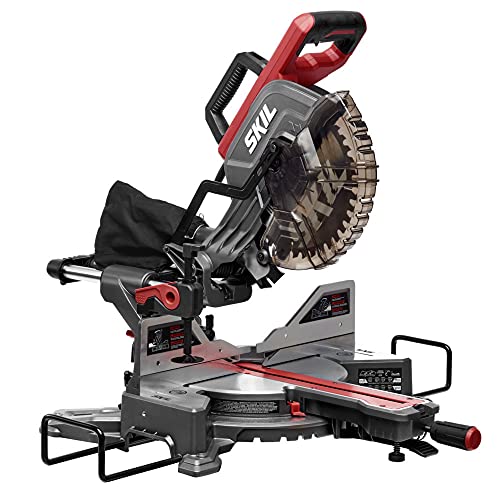
Learning how to replace a miter saw blade takes about ten minutes and a few basic tools. You will unplug the saw, lock the arbor, remove the old blade, and install the new one facing the correct direction. Done right, the saw will cut square and run smoothly.
Before You Start: Safety and Tools
Always disconnect the saw from power before touching the blade. For battery models, remove the battery as well. Keep the saw on a stable bench and let the blade cool if you have just been cutting.
Shopping for one? See our guide: Blade to Cut Metal for Miter Saw (2026): Which Should You Choose?.
Gather these items before you begin:
- Wrench or hex key matching the arbor nut (most saws use a 5/8-inch or 13 mm wrench, but check your manual)
- Replacement blade with the correct diameter and arbor hole size
- Cloth or gloves for handling the blade teeth
- Stiff brush or rag for cleaning the arbor flange
Step-by-Step: Removing the Old Blade
- Lower the blade guard fully and lock the saw head in the down position.
- Press the spindle lock button (often marked with a padlock icon or located near the arbor). Hold it while you turn the blade slightly until the lock engages.
- Loosen the arbor nut counterclockwise. Most miter saws use a standard right-hand thread, so the nut turns left to loosen.
- Remove the outer flange, then lift the old blade off the arbor. Note which way the teeth face so you can match the orientation.
Installing the New Blade Correctly
Clean the inner and outer flanges with a rag so no sawdust or resin sits between the metal surfaces. Even a small buildup can cause wobble and uneven cuts.
- Slide the new blade onto the arbor, making sure the teeth point in the same direction as the arrow on the guard or the saw body. The arrow indicates the blade’s rotation.
- Reinstall the inner flange if your saw uses one, then the outer flange, keeping the flat side against the blade.
- Hold the spindle lock and tighten the arbor nut clockwise until snug. Do not overtighten, since excess force can distort the flange or damage the arbor threads.
- Release the lock and rotate the blade by hand to confirm it spins freely and does not rub the guard.
Checking Alignment and Making a Test Cut
After installation, check that the blade is square to the table. Many saws have a 90-degree stop; set the miter to zero, lower the blade, and use a combination square against the blade face and the fence. Adjust the stop screw if the gap is uneven.
Run a test cut on scrap wood. Listen for smooth operation and look for burn marks or tear-out. If the blade wobbles or the cut drifts, unplug the saw and recheck the flange seating.
Common Mistakes
- Installing the blade backward, which causes poor cuts and can damage the saw.
- Using a blade with the wrong arbor hole size or diameter for your model.
- Skipping the flange cleaning step, leading to wobble.
- Overtightening the arbor nut, which can warp the flange.
- Forgetting to unplug the saw or remove the battery before starting.
Recommended Gear
- Miter saw blade wrench set: A dedicated arbor wrench fits the nut securely and reduces slipping. View on Amazon
- Blade cleaning brush: A stiff brush removes pitch and sawdust from the flanges before you fit the new blade. View on Amazon
- Combination square: Useful for checking the blade against the table after installation. View on Amazon
FAQ
How often should I replace a miter saw blade?
Replace or sharpen the blade when cuts start to burn, tear out, or require extra force. Frequency depends on the material you cut and how often you use the saw.
Can I use any blade on my miter saw?
No. The blade diameter must match the manufacturer’s specification, and the arbor hole must fit the saw. Check your manual before buying.
What if the arbor nut is stuck?
Make sure the spindle lock is fully engaged, then apply steady pressure to the wrench. Penetrating oil may help if the nut is corroded. Consult the manufacturer or a professional if it still will not turn.
Conclusion
Replacing a miter saw blade is a simple task once you follow the right order: disconnect power, lock the arbor, install the blade in the correct direction, and check alignment. Take your time with the flanges and nut, and your saw will stay accurate. Refer to your owner’s manual for model-specific details.
Related reading
- How to Replace a Blade on a DeWalt Miter Saw: Step-by-Step Guide (2026)
- Steel Blade for Miter Saw: How to Choose and Use One Safely (2026)
- Miter Saw Metal Blade: How to Pick and Use One Safely (2026)
- How to Change Miter Saw Blade: A Step-by-Step Guide for Beginners
- 12 Miter Saw Blade: How to Choose the Right One for Clean Cuts
Ready to choose one?
About Caleb Morgan
Caleb Morgan is part of our editorial team and reviews and edits our power tools guides, checking product details against manufacturer specifications and owner feedback.