By Caleb Morgan
Updated November 2026
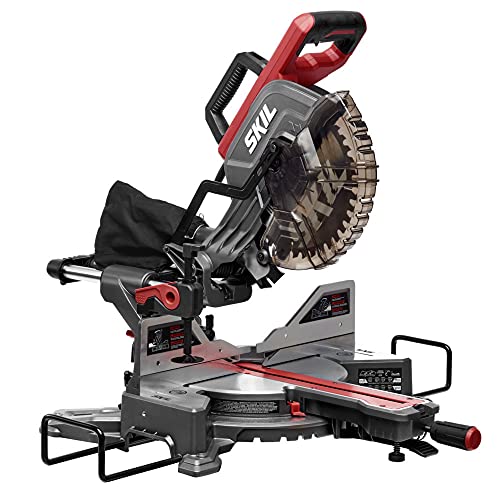
Changing a miter saw blade takes about five minutes once you know the order of operations. You will unplug the saw, lock the arm, remove the arbor bolt, swap in a new blade with the teeth facing the right way, and confirm everything is tight before the first cut. The steps below apply to most common sliding and non-sliding miter saws, though your manual has the final word on your model. You may also like How to Operate a Miter Saw: A Step-by-Step Guide for Beginners.
Before You Start
Gather a few basics before touching the saw. Most blade changes need only the wrench that came with the saw, though some models use a hex key or a spindle lock button instead. Keep a clean rag nearby and wear cut-resistant gloves while handling the blade, since the teeth stay sharp even when the blade is dull to the eye.
Shopping for one? See our guide: 3 Best Miter Saw Work Tables for Job Sites and Shops: Picks Compared (2026).
- Unplug the saw from the outlet, or remove the battery on cordless models.
- Read the manual for the arbor lock and bolt location.
- Have the new blade’s arbor size (usually 5/8 inch) confirmed against the saw.
- Check that the blade is rated for the material you plan to cut.
How to Change a Miter Saw Blade, Step by Step
- Lower the blade guard and lock the arm. Pull the blade down to the lowered position and secure it with the transport latch so it cannot move.
- Engage the spindle lock. Press or hold the spindle lock button while turning the blade slightly by hand until it locks in place.
- Loosen the arbor bolt. Use the wrench to turn the arbor bolt counterclockwise. Most saws have a left-hand thread on the arbor bolt, so the bolt turns clockwise to loosen on some models. Confirm this in your manual before applying force.
- Remove the outer washer and blade. Lift off the outer flange, then slide the old blade off the arbor. Note the position of the inner flange and leave it in place.
- Clean the flanges. Wipe away sawdust and pitch from both flanges. Debris here causes wobble and uneven cuts.
- Install the new blade. Slide the blade onto the arbor so the teeth point in the direction of rotation shown by the arrow on the blade guard. The arrow on the blade must match the saw’s rotation.
- Reattach the outer flange and tighten the bolt. Hold the spindle lock, then tighten the arbor bolt firmly. Do not overtighten; snug plus a modest turn is enough.
- Test the setup. Release the lock, plug the saw back in, and let the blade spin up with the guard down. Listen for wobble or rubbing before making a cut.
Checking Blade Direction and Fit
Blade direction is the most common error. A blade installed backward will cut poorly, burn the wood and can kick back. The arrow printed on the blade should point the same way as the arrow on the guard or the motor housing. Also confirm the blade diameter is correct for your saw, since a 10-inch blade will not fit a 12-inch saw safely and the wrong size can damage the guard.
Common Mistakes
- Forgetting to unplug the saw before reaching near the blade.
- Installing the blade with the teeth facing backward.
- Skipping the flange cleaning, which leads to a wobbling blade.
- Overtightening the arbor bolt, which can strain the spindle.
- Using a blade with a different arbor hole size than the saw requires.
Recommended Gear
- Cut-resistant gloves: These protect your hands when handling a sharp blade. View on Amazon
- Replacement miter saw blade: Choose one with the correct tooth count for your material. View on Amazon
- Blade wrench or arbor wrench set: Many saws need a specific wrench, and a spare set helps if one goes missing. View on Amazon
For more detail on blade selection, see 12 Miter Saw Blade: How to Choose the Right One for Clean Cuts and Saw Blades: Tooth Count, Kerf and Grind for Circular, Miter and Table Saws. If you own a specific brand, How to Replace a Blade on a DeWalt Miter Saw: Step-by-Step Guide (2026) walks through that model’s layout.
FAQ
How do I know which way the miter saw blade should face?
The teeth should point in the direction of rotation shown by the arrow on the blade guard or motor housing. The arrow printed on the blade itself should match that direction.
Do I need to remove the blade guard to change the blade?
Usually no. Most saws let you lower the guard and access the arbor bolt, though some models require lifting the lower guard. Check your manual for the exact steps.
How often should I change my miter saw blade?
Change or sharpen the blade when cuts start to burn, tear or require more pressure than usual. Replacement timing depends on how much you cut and what materials you use.
Conclusion
Changing a miter saw blade is a short job when you unplug the saw, lock the spindle, and check blade direction before tightening. Follow your manual for your model’s arbor bolt and lock, and take your time on the test spin. If anything feels off, stop and recheck the fit.
Related reading
- How to Change a Circular Saw Blade
- How to Change a Band Saw Blade
- Replacement Parts for Kobalt Miter Saw: Where to Find Them and How to Swap Them
- Miter Saw to Cut Metal: Blade, Setup and Safety Steps That Work
Ready to choose one?
About Caleb Morgan
Caleb Morgan is part of our editorial team and reviews and edits our power tools guides, checking product details against manufacturer specifications and owner feedback.