By Caleb Morgan
Updated November 2026
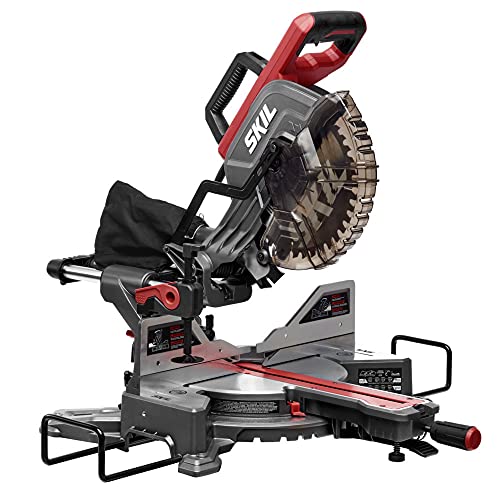
Learning how to operate a miter saw comes down to four things: a secure workpiece, a square and sharp blade, a firm and controlled cut, and a safe release of the saw head. Once you understand that sequence, you can make accurate crosscuts and angled cuts on trim, framing lumber and molding. This guide walks through the process from setup to your first clean cut.
Set Up the Saw and Work Area
Place the saw on a stable, level surface, ideally a dedicated stand or bench. Make sure the table is flat and the fence is firmly tightened. Check that the blade guard moves freely and returns on its own. Keep the area behind the saw clear so long workpieces have room to sit flat without tipping.
Shopping for one? See our guide: 3 Best Miter Saw Work Tables for Job Sites and Shops: Picks Compared (2026).
Before you plug in or connect a battery, confirm the blade is tight and the arbor nut is secure. Check your saw’s manual for the correct blade rotation direction if you are changing blades. If you need to swap one, see How to Change Miter Saw Blade: A Step-by-Step Guide for Beginners for the full process.
Set the Angle and Bevel
Most miter saws have a detent system that locks at common angles such as 0°, 15°, 22.5°, 30° and 45°. Pull the miter lock handle, rotate the table until the pointer sits on your target angle, and lock it. For compound cuts, loosen the bevel lock, tilt the head to the required bevel, and tighten it again.
Always recheck the setting before cutting. Many beginners assume the detent is exact, but a quick test cut on scrap will show whether your saw is dead on. If you cut crown molding, the angles and bevels interact, so a test piece is especially useful.
Secure the Workpiece and Make the Cut
- Lay the board flat against the fence, with the face you want visible facing down or toward the fence, depending on the cut.
- Hold the workpiece firmly against the fence with your non-cutting hand, keeping fingers at least several inches from the blade path.
- Use a clamp for short pieces or any cut where your hand would be close to the blade.
- Pull the head up and out, and turn the saw on. Let the blade reach full speed before lowering it.
- Lower the head smoothly and steadily through the cut. Let the blade do the work rather than forcing it.
- Hold the head down until the blade stops completely, then raise it back to the top position.
Keep the trim on the table and do not drop the head while the blade is still spinning. Support long boards with stands at the same height as the saw table so they do not lift or pivot during the cut.
Check Your Cut and Adjust
Measure the finished piece against your mark and check the angle with a combination square or a digital angle gauge. If the cut is slightly off, adjust the detent or fence rather than trying to correct it by feel. A consistent process gives repeatable results, and a stop block helps with identical lengths. See Miter Saw Stop Block: How to Set One Up for Repeatable Cuts for setup details.
Clean up the cut by checking for tear-out or burn marks. Dull or incorrect blades are the most common cause, so a blade change often solves the problem faster than adjusting the saw.
Common Mistakes to Avoid
- Cutting without a secure hold, which can pull your hand toward the blade.
- Lowering the blade before it reaches full speed, which causes rough cuts and strain on the motor.
- Reaching behind the guard or across the blade path while the saw is running.
- Trusting the detent without a test cut, especially for compound angles.
- Using a blade not rated for the material. For metal, see Using Miter Saw to Cut Metal: A Step-by-Step Guide for Clean Results.
Recommended Gear
Safety glasses and hearing protection are essential, since miter saws are loud and throw debris. Look for a pair of impact-rated glasses that fit comfortably over your regular frames.View on Amazon
A pair of bar clamps helps hold longer boards flat and keeps your hands clear of the blade path.View on Amazon
A set of sawhorses or a folding miter saw stand gives long stock stable support at the correct height.View on Amazon
FAQ
Do I need to let the blade reach full speed before cutting?
Yes. Waiting for full speed produces cleaner cuts and reduces strain on the motor. Lower the head only after the blade is spinning at its normal rate.
How do I know if my miter saw is accurate?
Make a test cut on scrap at 0° and 45°, then check the angles with a square. If the cuts are off, consult your manual for calibration steps, or have the saw serviced.
Can I cut very short pieces safely?
Short pieces are hard to hold without putting your fingers near the blade. Use a clamp or a jig, and consult the manufacturer’s guidance on minimum workpiece sizes before cutting.
Conclusion
Once you know how to operate a miter saw, the process becomes routine: set the angle, secure the workpiece, cut with a steady motion, and check the result. Practice on scrap until the setup feels natural. Always follow the manufacturer’s safety instructions in your saw’s manual.
Related reading
- Steel Blade for Miter Saw: How to Choose and Use One Safely (2026)
- Replacement Parts for Kobalt Miter Saw: Where to Find Them and How to Swap Them
Ready to choose one?
About Caleb Morgan
Caleb Morgan is part of our editorial team and reviews and edits our power tools guides, checking product details against manufacturer specifications and owner feedback.