By Caleb Morgan
Updated November 2026
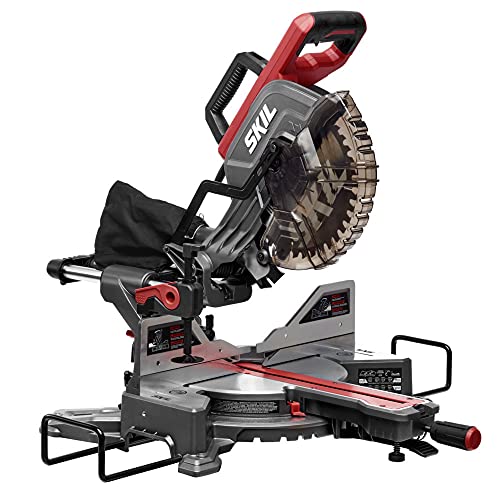
A miter saw metal blade lets you make clean, square cuts through steel, aluminum and other non-ferrous metals on a saw designed mainly for wood. The key is choosing a blade made for metal, setting the saw up correctly and feeding the cut slowly enough that the blade and the workpiece stay under control. This guide covers how to choose the right blade, prepare the saw and make the cut.
Choose a Blade Built for Metal
Not every blade labeled for a miter saw can handle metal. Look for a blade specifically marketed for ferrous or non-ferrous metal, usually with a high tooth count and a negative or low hook angle. Carbide-tipped blades are common for aluminum and mild steel, while abrasive cut-off wheels are a different tool and should not be swapped in on a standard miter saw arbor unless the saw manufacturer permits it. Check the blade’s maximum RPM against your saw’s speed and confirm the arbor bore matches.
Shopping for one? See our guide: 3 Best Miter Saw Work Tables for Job Sites and Shops: Picks Compared (2026).
Prepare the Saw and the Workpiece
Before you cut metal, make the saw ready for the job:
- Unplug the saw or remove the battery, then install the metal blade and tighten the arbor nut firmly.
- Check that the guard moves freely and returns on its own.
- Set the bevel and miter angles, then lock them.
- Clamp the metal to the fence and table. Never hold it by hand.
- Support long stock on both sides so offcuts do not drop and pinch the blade.
Set the Right Speed and Feed Rate
Metal needs slower feed than wood. Let the blade reach full speed before it touches the stock, then lower it with steady, moderate pressure. If you see sparks streaming in a steady stream, you are usually cutting at a reasonable pace. Heavy bogging, blue discoloration or smoke means the feed is too aggressive or the blade is dull.
Make the Cut and Manage Heat
Metal generates heat fast, which dulls carbide teeth and can warp thin stock. Make one smooth pass rather than repeated stop-start plunges. If the workpiece gets hot, let the blade and metal cool before you continue. Many metal blades are designed for dry cutting, but some owners apply cutting fluid sparingly to reduce heat and burrs; check your blade’s packaging for guidance. Deburr the cut edge with a file afterward.
Common Mistakes
- Using a wood blade on metal, which can chip teeth and kick back.
- Forcing the cut instead of letting the blade work at its own pace.
- Cutting thin sheet without clamping it, which lets it grab and spin.
- Skipping the guard check or running the saw with a loose arbor nut.
- Ignoring a blade that smokes or glows, which means it is dull or overheated.
Recommended Gear
- Metal-cutting carbide blade: A blade with fine, high-tooth-count carbide teeth produces smoother cuts in aluminum and thin steel. View on Amazon
- Quick-clamp hold-downs: Clamps keep thin metal flat and stop it from lifting into the blade during the cut. View on Amazon
- Metal file set: A file removes burrs left by the saw and leaves a safer, cleaner edge. View on Amazon
FAQ
Can any miter saw cut metal?
Most miter saws can cut soft metals like aluminum with the right blade, but only if the saw’s speed, arbor and guard are compatible. Check the manufacturer’s manual before cutting steel or other hard metals.
Do I need cutting fluid?
Not always. Many metal blades run dry, but a little lubricant can reduce heat and burrs on some materials. Follow the blade maker’s guidance.
How do I know when the blade is dull?
Signs include excessive burning, smoke, rough edges, and the saw bogging more than usual. A dull blade should be sharpened by a professional or replaced.
Conclusion
A miter saw metal blade works well when you match it to the material, set the saw up carefully and feed the cut at a steady, controlled pace. Clamp your stock, watch for heat and deburr the edges when you finish. If you are unsure whether your saw can safely handle metal, consult the manufacturer or a qualified professional before you start.
Related reading
- Saw Blades: Tooth Count, Kerf and Grind for Circular, Miter and Table Saws
- Miter Saw Stands, Cutting Guides and Sawhorses
- Miter Saw Harbor Freight: How to Choose and Use One Safely (2026)
Ready to choose one?
About Caleb Morgan
Caleb Morgan is part of our editorial team and reviews and edits our power tools guides, checking product details against manufacturer specifications and owner feedback.