By Caleb Morgan
Updated November 2026
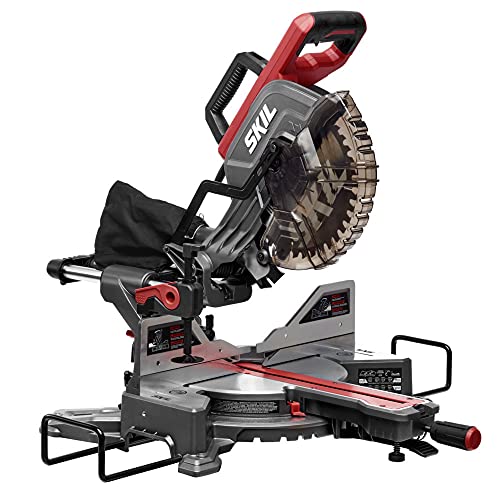
A Milwaukee sliding miter saw gives you wider crosscuts than a standard miter saw, so you can cut boards up to a much greater width at square and angled settings. This guide walks through setup, calibration, the cutting steps that keep your cuts accurate, and the mistakes that most often cause ragged or out-of-square results. Follow these steps and you should be able to make clean, repeatable cuts on trim, framing and shelving stock.
Set Up the Saw Before the First Cut
Start by mounting the saw on a stable surface at a height that lets you stand square to the cut line without leaning. A stand or work table with level, rigid support keeps the fence and table from flexing. Check the owner’s manual for the blade-size rating and the maximum bevel and miter angles for your specific model, since these vary by configuration.
Shopping for one? See our guide: 7 Best Sliding Compound Miter Saws of 2026.
- Confirm the blade is sharp, clean and rated for the saw’s diameter.
- Make sure the blade guard moves freely and returns on its own.
- Check that the slide rails are clean and free of sawdust and resin.
- Connect a dust collection bag or shop vac to the port.
Calibrate the Miter and Bevel Settings
Factory settings drift, especially after transport or heavy use. Calibration is what makes your 90-degree and 45-degree cuts actually land at those angles.
- Check the 0-degree stop. Lower the blade (unplugged) and place a reliable square against the fence and the blade plate. Adjust the miter detent or stop screw until the blade sits flush with the square.
- Check the bevel stop. Set the bevel to 0 degrees and verify the blade is perpendicular to the table using the same square.
- Test with a cut. Make a crosscut on a scrap board, flip one piece and butt the cut edges together. A gap or overlap shows you the error to correct.
- Adjust the fence. If the fence is not 90 degrees to the blade, use the fence adjustment bolts described in your manual.
Make Accurate Sliding Cuts
The sliding function is what distinguishes this type of saw. For a wide board, pull the head fully toward you, lower the blade through the stock, then push forward through the cut. Pulling the head toward you and letting the blade pass through the full width of the board keeps the cut from wandering.
Hold the Work Correctly
Keep the board flat against the fence and the table. Use a clamp for short pieces and any stock you cannot hold firmly with one hand. Keep your hands at least several inches from the blade path, and never reach under the guard.
Control the Cutting Speed
Let the blade reach full speed before it touches the wood. Push through at a steady pace. Forcing the cut overheats the blade, causes burning and raises the risk of kickback.
Choose the Right Blade for Your Material
Tooth count and grind matter more than most users expect. A blade with a higher tooth count generally produces a smoother finish on trim and molding, while a lower tooth count clears material faster in framing lumber. Check the blade packaging for its intended use and confirm the arbor size matches your saw.
| Material | Suggested Tooth Count | Finish Quality |
|---|---|---|
| Framing lumber | Lower | Rougher, faster cut |
| Trim and molding | Higher | Smoother, cleaner edge |
| Laminate or melamine | High, with a fine grind | Minimal chipping |
Common Mistakes to Avoid
- Skipping calibration after moving the saw, which leads to angles that look right but fail when pieces are joined.
- Pushing the blade through the cut too quickly, causing burn marks and tear-out.
- Cutting unsupported long boards, which lets the offcut drop and pinch the blade.
- Using a dull or wrong-type blade, then blaming the saw for rough results.
- Reaching over the blade or removing offcuts while the blade is still spinning.
Recommended Gear
- A sturdy miter saw stand: A rigid stand keeps the saw level and supports long stock at the same height as the table. View on Amazon
- A combination square: Useful for checking the 0-degree and bevel stops during calibration. View on Amazon
- Clamps for the fence: Holding workpieces firmly keeps cuts consistent and your hands clear of the blade. View on Amazon
FAQ
How often should I calibrate a sliding miter saw?
Check calibration whenever you move the saw, change the blade, or notice cuts that do not fit together. Routine checks every few weeks of regular use are a reasonable habit.
Can a sliding miter saw cut wide boards?
Yes. The sliding action is designed for wider stock than a fixed-head saw can handle, but the maximum width depends on the model, so check the manufacturer’s specifications.
What blade should I use for trim work?
A higher tooth-count blade rated for finish cutting produces the cleanest edges on trim and molding. Match the blade’s arbor size to your saw before buying.
Conclusion
A properly set up and calibrated Milwaukee sliding miter saw will make accurate, repeatable cuts across a wide range of stock. Take time with the 0-degree and bevel checks, choose a blade suited to your material, and control the cut rather than forcing it. For model-specific safety instructions and maximum capacities, always consult the owner’s manual.
Related reading
- Miter Saw Buying Guide: Size, Sliding and Compound Explained
- DeWalt vs Milwaukee Miter Saw: Which Fits Your Cuts in 2026?
- Saw Blades: Tooth Count, Kerf and Grind for Circular, Miter and Table Saws
Ready to choose one?
About Caleb Morgan
Caleb Morgan is part of our editorial team and reviews and edits our power tools guides, checking product details against manufacturer specifications and owner feedback.