By Caleb Morgan
Updated November 2026
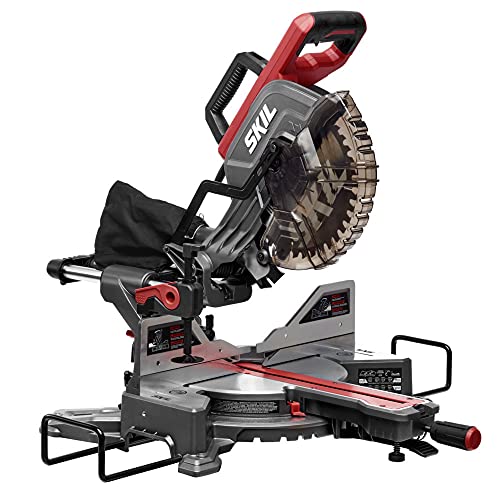
The Bosch GCM12SD is a 12-inch dual-bevel sliding compound miter saw, and getting accurate cuts from it comes down to three things: a square and calibrated setup, correct blade and stock handling, and consistent use of the guard and clamping. This guide walks through each step so you can get clean, repeatable miter and bevel cuts from the bosch compound miter saw gcm12sd on your first session.
Set Up the Saw Before the First Cut
Mount the saw on a stable stand or bench with the base fully supported. A wobbling saw will cut inconsistent angles no matter how well you calibrate it. Check that the saw is unplugged, then confirm the blade is seated correctly and the arbor nut is tight.
Shopping for one? See our guide: 7 Best Sliding Compound Miter Saws of 2026.
Next, verify the 90-degree stop. Lower the blade, place a drywall square against the blade and the fence, and check for gaps. If the blade is out of square, adjust the stop screw until the blade sits flush to the square on both sides. Repeat the check at 45 degrees left and right, since miter detents can drift over time.
Make Accurate Miter and Bevel Cuts
Miter angles are set by rotating the table. Release the miter lock, pull the detent plate or turn the handle to your target angle, and confirm the reading on the scale. For a test, cut two pieces of scrap at the same angle and fit them together. A gap on the outside edge usually means the angle is slightly too shallow or the blade is not square.
Bevel cuts tilt the head. Unlock the bevel handle, set the angle, and lock it before cutting. Dual-bevel designs like this one let you cut left or right without flipping the workpiece, which is useful for compound cuts such as crown molding.
Steps for a Repeatable Cut
- Clamp the workpiece firmly against the fence and table.
- Set the miter and bevel angles, then lock both.
- Let the blade reach full speed before the cut begins.
- Lower the head smoothly and do not force the blade through the wood.
- Return the head to the up position before removing the cut piece.
Handle Sliding Cuts and Wider Stock
When cutting wide boards, pull the head toward you along the slide rails, then push through. Keep the slide rails clean, since sawdust buildup causes binding and uneven movement. A light coat of dry lubricant on the rails, as the manufacturer recommends, helps keep the slide smooth.
Recommended Gear
- Clamps for holding stock: A pair of bar clamps keeps boards flat against the fence and prevents movement during cuts. View on Amazon
- Drywall square: A large square is the simplest way to check blade alignment at 90 degrees. View on Amazon
- Extension supports: Roller stands or outfeed supports keep long boards level and reduce tip-up. View on Amazon
Common Mistakes
- Skipping the square check after moving or transporting the saw.
- Letting offcuts bind the blade by not supporting both sides of the workpiece.
- Cutting without clamping small pieces, which can kick back or shift.
- Leaving the lower guard unchecked; it should move freely and return on its own.
- Using a dull or mismatched blade, which tears wood and throws off the cut quality.
For blade selection, see Saw Blades: Tooth Count, Kerf and Grind for Circular, Miter and Table Saws and 12 Miter Saw Blade: How to Choose the Right One for Clean Cuts. If you are weighing this model against others, Miter Saw Buying Guide: Size, Sliding and Compound Explained covers the main differences.
FAQ
How do I check whether the Bosch GCM12SD is square?
Place a drywall square against the blade and the fence with the miter at 0 degrees and the bevel at 0 degrees. If there is a visible gap, adjust the 90-degree stop screw until the blade sits flush to the square.
Can I make compound cuts with this saw?
Yes. Set both the miter angle and the bevel angle, lock each one, and make a test cut on scrap before cutting finished stock.
Why is my cut edge rough?
A dull or incorrect blade, a fast feed rate, or unsupported stock are the most common causes. Check the blade condition and make sure the workpiece is fully supported and clamped.
Conclusion
Calibrating the square stop, locking angles before each cut, and supporting your stock will do more for cut quality than any single accessory. Make a few test cuts on scrap to confirm your setup before you start on finished work. Always follow the manufacturer’s manual for safety and maintenance details.
Related reading
- Bosch Miter Saw 12 Inch: How to Choose and Use One Safely (2026)
- 5 Best DeWalt Compound Miter Saws for Home and Jobsite Use (2026)
- Ryobi Sliding Miter Saw: Setup, Cutting Tips and Buying Guide (2026)
- Parts for DeWalt Miter Saw: Finding and Replacing the Right Components
Ready to choose one?
About Caleb Morgan
Caleb Morgan is part of our editorial team and reviews and edits our power tools guides, checking product details against manufacturer specifications and owner feedback.