By Caleb Morgan
Updated November 2026
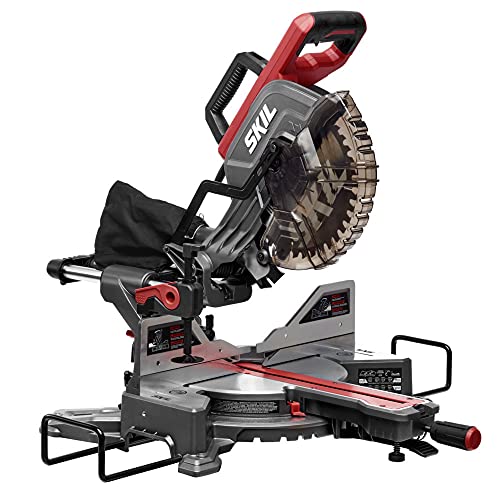
A fence for miter saw work gives you a flat, square reference face that holds your stock steady and keeps long or repeated cuts consistent. You can build one from plywood or MDF in an afternoon, then square it to the blade and add a zero-clearance insert so the cut edge doesn’t tear out. The steps below walk through setup, alignment and the small details that make a fence actually useful. You may also like Woodworking Miter Saw Table Plans: A Step-by-Step Build Guide.
Why a Fence Matters on a Miter Saw
The factory fence on most miter saws is thin, and it often flexes under pressure or sits slightly out of square. A wider auxiliary fence gives you more support for tall or wide boards and a surface you can clamp to. It also protects the saw’s own fence from sawdust and scoring. If you cut the same length over and over, a fixed stop block on the fence matters even more than the fence itself. For background on the saw itself, see Miter Saw Buying Guide: Size, Sliding and Compound Explained.
Shopping for one? See our guide: 3 Best Miter Saw Work Tables for Job Sites and Shops: Picks Compared (2026).
Build and Square the Auxiliary Fence
Most people use a piece of 3/4-inch plywood or MDF, roughly the saw’s table width and about 4 to 6 inches tall. Attach it to the existing fence with screws driven from the back, keeping the screw heads well clear of the blade path.
- Set the saw to 0 degrees and lower the blade through a scrap piece to mark the cut line on the fence.
- Cut a shallow kerf through the auxiliary fence along that line so the blade can pass through it without touching metal.
- Check square by cutting a test piece, flipping one half and butting the two cut edges together. Any gap shows the error.
- Adjust the saw’s 0-degree stop or shim the fence until the test cut closes tight.
Add a Zero-Clearance Insert
A zero-clearance insert fills the gap around the blade so the workpiece is supported right up to the cut. This reduces tear-out on the bottom face, especially in plywood and melamine. Cut the insert from a thin, flat sheet, set the blade to its full cutting depth and run it through slowly to create the slot. Keep the insert flush with the table and fasten it with screws or small clamps so it doesn’t shift.
Set Up Stops and Clamping
A stop block clamped to the fence lets you repeat a length without measuring each piece. Mark its position from the blade, not from the end of the saw, and confirm with a test cut. Clamp the board firmly against the fence before the cut, and keep your hands at least several inches from the blade path. Many owners also add a clamp to the fence itself for holding narrow stock. For a broader look at workspace setup, see Miter Saw Stands, Cutting Guides and Sawhorses.
Checklist
- Plywood or MDF, 3/4 inch, sized to the table
- Square and a known-straight test board
- Scrap for kerf and insert cutting
- Screws, a drill driver and clamps
- Stop block and a rule or tape measure
Recommended gear
- Framing or combination square: Checks the fence against the table and blade quickly during alignment. View on Amazon
- Quick-release clamps: Hold the workpiece and stop block without tying up both hands. View on Amazon
Common Mistakes and Tips
- Skipping the test cut. Always verify square after any adjustment.
- Screwing the fence on through the blade path. Keep fasteners well clear of the kerf.
- Using a fence that is too short for the stock you cut most often.
- Letting the insert or fence shift during cuts. Re-check clamps and fasteners periodically.
- Forgetting to unplug the saw before changing the blade, adjusting the insert or working near the blade.
Miter saws are a common source of injuries, so follow the manufacturer’s guard and blade guidelines at all times. If you are unsure about setup, a qualified professional or the saw maker’s support line can confirm details. For blade selection that affects tear-out, see Saw Blades: Tooth Count, Kerf and Grind for Circular, Miter and Table Saws.
FAQ
Do I need to build a fence, or can I use the one that came with the saw?
You can use the factory fence, but many users add an auxiliary fence for more support and better dust protection. A wider fence helps with tall or wide boards.
How do I know if my fence is square?
Make a cut, flip one piece and butt the cut edges together. If a gap shows, adjust the fence or the saw’s stop until the joint closes tight.
What is a zero-clearance insert for?
It supports the wood right up to the blade, which reduces tear-out on the bottom face. It is especially useful when cutting plywood or laminated panels.
Conclusion
A well-built fence for miter saw use gives you a flat reference, better support and cleaner edges. Square it carefully, add a zero-clearance insert and use a stop block for repeat cuts. Take a few minutes to test and adjust, and your cuts will be more accurate for every project that follows.
Related reading
- Miter Saw Harbor Freight: How to Choose and Use One Safely (2026)
- How to Evaluate a Circular, Miter or Table Saw Before You Buy
- DeWalt vs Milwaukee Miter Saw: Which Fits Your Cuts in 2026?
Ready to choose one?
About Caleb Morgan
Caleb Morgan is part of our editorial team and reviews and edits our power tools guides, checking product details against manufacturer specifications and owner feedback.