By Caleb Morgan
Updated November 2026
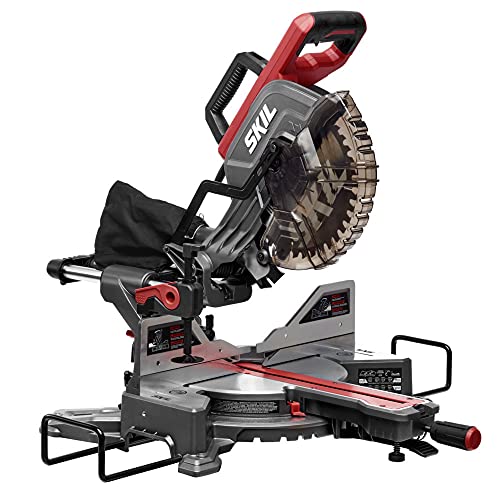
A miter saw stop block is a simple fence accessory that holds your workpiece at the same distance from the blade every time, so you can cut identical lengths without measuring each piece. Setting one up takes a few minutes: you measure the target length from the blade, clamp the block to the fence, and verify with a test cut. This guide walks through the setup, the factors that affect accuracy, and the errors that most often cause pieces to come out short or long. For a deeper look, Compound Miter Saw Craftsman: How to Set Up and Make Accurate Cuts (2026) covers this in detail.
What a Stop Block Does and Why It Matters
Repeat cuts are where a miter saw earns its keep. Measuring and marking every piece invites small errors that add up across a project like a set of shelves or a fence rail. A stop block removes that step by giving the board a fixed reference point. Many miter saws include a stop bar or fence, but a separate stop block clamped to the fence or table gives you more flexibility for longer or shorter runs.
Shopping for one? See our guide: 3 Best Miter Saw Work Tables for Job Sites and Shops: Picks Compared (2026).
Setting Up a Stop Block Step by Step
- Unplug the saw or confirm the battery is removed before touching the blade area.
- Measure the finished length you need. Measure from the face of the blade to the inside edge of the block, not from the end of the fence.
- Position the block on the fence or table at that distance. Use a tape or a known-good square piece as a spacer.
- Clamp the block firmly so it cannot shift when the workpiece bumps it.
- Make a test cut on scrap of the same material, then measure the result against your target.
- Adjust the block in small increments until the test piece matches, then lock it down.
Accounting for Blade Kerf
The blade removes material as it cuts, and that width is the kerf. Because the block sits on the side of the blade, the kerf can throw off a length by a small amount if you measure from the wrong point. Check the test cut rather than trusting the tape alone. A full-kerf blade and a thin-kerf blade will give slightly different results at the same block position.
Choosing the Right Block Setup
Stop blocks come in several forms. A simple clamp-on block works for most home shops. A fence-mounted rail with a sliding stop gives finer adjustment for repetitive work. Whatever you choose, the block should be rigid, flat on the contact face, and wide enough that the workpiece cannot tip past it.
| Setup type | Best for | Main limitation |
|---|---|---|
| Clamp-on block | Occasional repeat cuts | Must be re-set after moving the fence |
| Fence-mounted rail with stop | Frequent identical lengths | More parts to align |
| Built-in stop bar on saw | Quick setups, short runs | Less adjustable for long stock |
Keeping Cuts Accurate Over Time
A stop block only stays accurate if the saw stays square. Check the blade against the fence and the table regularly, and re-verify the block position after you change the bevel or miter angle, since some fence layouts shift when the head moves. Owners often report that the most reliable approach is to keep one known reference length and recheck it before a long run. For more on the saw itself, see Miter Saw Buying Guide: Size, Sliding and Compound Explained and Miter Saw Stands, Cutting Guides and Sawhorses for supporting long stock properly.
Common Mistakes
- Measuring from the end of the fence instead of from the blade.
- Skipping the test cut and assuming the first measurement is right.
- Leaving the block loose so the workpiece pushes it out of position.
- Forgetting to recheck the setting after a blade change or fence adjustment.
- Cutting long pieces without support, which lifts the stock off the block.
Recommended gear
A reliable tape measure and a few offcut test pieces help you confirm the block position before cutting finished stock. A clamp or two keeps the block from shifting during the cut.
- A rigid combination square helps check the fence and blade alignment. View on Amazon
- Bar clamps hold a clamp-on stop block firmly in place. View on Amazon
- A steel tape measure gives accurate reference lengths for setup. View on Amazon
FAQ
Do I need a stop block if my miter saw has a built-in fence?
Not always. A built-in fence works for short, simple repeats, but a separate stop block gives more room for longer pieces and makes it easier to repeat the same length across a project.
How do I know if my stop block is set correctly?
Make a test cut on scrap, then measure the piece against your target. If it matches, the block is set; if not, adjust in small steps and repeat.
Can a stop block affect safety?
Yes. Keep the workpiece pressed against the fence and never trap a small offcut between the block and the blade. Consult the saw manual for specific guidance on accessories.
Conclusion
A miter saw stop block turns repeated cutting into a fast, consistent process once it is set and verified. Measure from the blade, test on scrap, and recheck after any adjustment. With those habits, identical lengths become routine.
Related reading
- Saw Blades: Tooth Count, Kerf and Grind for Circular, Miter and Table Saws
- Miter Saw Harbor Freight: How to Choose and Use One Safely (2026)
Ready to choose one?
About Caleb Morgan
Caleb Morgan is part of our editorial team and reviews and edits our power tools guides, checking product details against manufacturer specifications and owner feedback.