A bench vise is one of the most fundamental tools in any workshop. It acts as a reliable third hand, holding your workpiece steady so you can focus on cutting, drilling, filing, or assembly. However, the right vise for your shop depends heavily on what you make. A metalworking vise is built for strength and rigidity, while a woodworking vise prioritizes speed and protecting the workpiece. This guide will walk you through the key differences, how to mount a vise securely, and the essential workholding accessories that make your shop safer and more efficient.
Understanding the Two Main Families: Metalworking vs. Woodworking Vises
The most important decision you will make is choosing between a vise designed for metal and one designed for wood. Each has a distinct construction and purpose.
Metalworking Vises
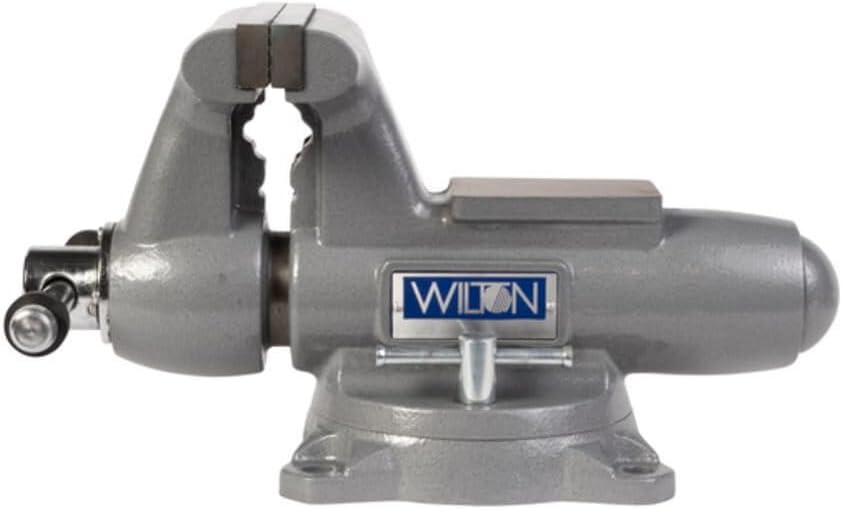
Often called a machinist’s vise, this type is built from heavy cast iron or steel. It features serrated jaws for gripping metal firmly, an anvil surface on the back for light hammering, and a swivel base that allows the vise to rotate and lock in position. These vises are designed to withstand heavy filing, sawing, and clamping force. The main drawback is that the serrated jaws will mar and dent wood, so you must use jaw liners when working with softer materials.
Woodworking Vises
Woodworking vises are designed specifically for the delicate nature of wood. Jaws are typically smooth and wide to distribute pressure evenly without crushing the fibers. Many feature a quick-release mechanism that lets you slide the movable jaw in and out rapidly, which is a huge time-saver when repositioning parts. There are several common types of woodworking vises:
- Face Vise: Mounted to the front edge of the workbench, with the jaw facing you. It is ideal for planing edges, sawing dovetails, and general assembly work.
- End Vise (Tail Vise): Mounted to the end of the bench. It often works in tandem with bench dogs to hold long boards flat on the bench surface for hand planing or routing.
- Shoulder Vise: A specialized vise with deep, thin jaws. It is designed to hold tenons and shoulders for precise joinery work without obstructing the workpiece.
Key Workholding Tools That Work with Vises
A vise is rarely used alone. Several accessories and complementary tools expand its usefulness and improve safety. For more details on integrating these with your bench, see our guide on workholding tools.
Wooden Jaw Liners
These are removable covers for the vise jaws. For a metalworking vise, liners protect wood from serrations. For a woodworking vise, they can be swapped out to fit a specific workpiece shape or to provide a softer grip. You can easily make your own from scrap hardwood like maple or oak, drilling and countersinking holes for mounting bolts.
Bench Dogs and Holdfasts
Bench dogs are round or square pegs that fit into a grid of holes in your benchtop. When used with a tail vise, they clamp a board flat between the dog in the vise and a dog in the bench. Holdfasts are traditional iron tools that fit into a hole in the bench. A sharp tap with a mallet sets the holdfast, securing the work firmly. Another tap releases it. They are excellent for hand tool work because they offer instant, adjustable clamping.
Clamping to Sawhorses
Sawhorses are great for supporting long stock during cutting or assembly, but the work must be secured. Never try to cut a board balanced on a sawhorse without clamping it. Use a C-clamp or bar clamp to fasten the workpiece to the horse. This prevents the board from shifting, binding the blade, or causing a kickback.
How to Choose the Right Vise for Your Work
Choosing the right vise comes down to matching the tool to your primary material and the space you have available. A good vise is a cornerstone of any woodworking tools collection.
Assess Your Primary Material
If you work mostly with metal, a heavy-duty machinist’s vise is the right choice. If you work mostly with wood, a woodworking vise is better. For mixed use, a metalworking vise with wooden jaw liners is a versatile compromise. The table below summarizes the key differences.
| Feature | Metalworking Vise | Woodworking Vise |
|---|---|---|
| Jaw Material | Cast iron or steel | Wood or metal with wood liners |
| Jaw Surface | Serrated | Smooth |
| Quick-Release | Rare | Common |
| Swivel Base | Common | Rare |
| Anvil Surface | Often present | No |
| Best For | Filing, drilling metal, light bending | Planing, chiseling, assembly |
Consider the Bench and Mounting
A vise is only as good as its mounting. The bench itself must be sturdy. A lightweight or flimsy bench will flex or tip under load. Through-bolting the vise to the bench is the only secure method. For a face vise, the bench should be heavy enough to resist tipping forward when you apply pressure.
How to Mount a Vise Securely
Proper mounting is critical for both performance and safety. A poorly mounted vise can shift, break, or cause serious injury.
Through-Bolting is Best
Drill holes through the benchtop at the vise’s mounting holes. Use carriage bolts or hex bolts with large washers and lock washers on the underside. Tighten firmly. For a metalworking vise, a steel plate on the underside helps distribute the immense clamping force and prevents the nuts from crushing the wood. Follow these steps:
- Position the vise on the bench and mark the hole locations.
- Drill completely through the benchtop.
- Insert the bolts from the top through the vise and the bench.
- Add large washers, lock washers, and nuts underneath.
- Tighten the nuts securely.
Positioning on the Bench
Face Vise: Mount it flush with the front edge of the bench, usually on the left side for a right-handed person. This allows you to hold long boards vertically or horizontally.
End Vise: Mount it flush with the end of the bench, usually the end opposite the face vise. This is primarily used with bench dogs.
Metalworking Vise: Mount it near a leg for maximum support, often in the center or right side of the bench. The swivel base allows you to angle the work as needed.
Safety First: Avoiding Common Mistakes
Safety is the most important aspect of using any workholding tool. A vise can fail catastrophically if abused.
Never Use a Cheater Bar
Adding a pipe to the vise handle for extra leverage is extremely dangerous. The handle is designed for hand-tightening only. Using a cheater bar can crack the vise casting, break the screw, or rip the vise off the bench, causing serious injury. If you need more clamping force, you need a larger vise.
Keep Work Secure Before Cutting
Always ensure the workpiece is fully seated and tightened in the vise before starting a cut. A loose workpiece can shift, causing the blade to bind or kick back. For long boards, use a support stand, sawhorse, or roller to prevent the end from flopping. This prevents binding and keeps the cut safe.
Protect Your Work and Your Vise
Use jaw liners for finished surfaces to prevent marring. Do not hammer directly on the vise screw, slide bars, or handle. Use the designated anvil area if your vise has one, or use a separate anvil. For routing small parts, a well-secured vise is safer than hand-holding. Check our wood router guide for more tips on safe routing practices.
Holding Small Parts Safely
Small parts present a unique challenge because they are difficult to hold securely without damaging them or putting your fingers at risk.
Using a Drill Press Vise
For drilling small parts, a dedicated drill press vise is essential. It holds the work securely and prevents it from spinning. Never hold small parts by hand while drilling. Always clamp them in a vise or use a drill press vise.
Vise Grips and Pliers
For very small or oddly shaped parts, locking pliers or a hand vise can be used to grip the part. These can then be held in the bench vise to provide a stable platform. This keeps your hands clear of the cutting area.
Care, Cleaning, and Upkeep
A bench vise is a simple machine that requires minimal maintenance to last a lifetime. Keep the main screw and slide bars clean and lightly lubricated with oil or grease. Wipe off dust, grime, and metal shavings after use. If the vise has a swivel base, keep the locking mechanism clean and free of debris. Store the vise with the jaws slightly open to relieve tension on the spring and screw, which prevents premature wear.
FAQ
Can I use a metalworking vise for woodworking?
Yes, but you must use wooden jaw liners to protect the wood from the serrated metal jaws. Without liners, the jaws will leave deep marks in your workpiece.
What size vise do I need?
Match the jaw width to your typical workpiece. For general home and DIY use, a vise with 4-inch to 6-inch jaws is a good starting point. Larger vises offer more clamping force but take up more bench space.
How do I attach a vise to a workbench?
The best method is through-bolting. Drill holes in the bench top, insert bolts from the top, and secure them with large washers and nuts underneath. This provides the strongest and safest hold.
What is a quick-release vise?
It is a woodworking vise that allows you to disengage the screw so you can slide the jaw in and out quickly. You re-engage the screw for final tightening. This saves a significant amount of time when repositioning work.
Choosing the right vise and workholding tools is an investment in both safety and accuracy. By matching the vise to your primary material, mounting it securely, and using accessories like jaw liners and bench dogs, you create a solid foundation for every project. Always prioritize safety by keeping your work secure and never forcing the tool beyond its limits.